Editor and Simulator
The SmartThings editor and simulator allows you to create, edit, and test SmartApps and Device Type Handlers.
In this chapter, you will learn:
- How to create new SmartApps or Device Type Handlers from scratch or from an existing template.
- How to use the simulator to test your custom code - without requiring actual physical devices!
Creating a New SmartApp
To create a new SmartApp, click the New SmartApp button from the My SmartApps page.
There are three different tabs on the New SmartApp page that allow you to create a new SmartApp in different ways:
- From Form allows you to create a new SmartApp based on the some metadata you can enter into the form.
- From Code allows you to create a new SmartApp directly from existing code. This is useful if you receive the code for a SmartApp - just paste it in to the page and a new SmartApp will be created from it.
- From Template allows you to create a new SmartApp based upon existing SmartApps. This is especially useful if you are new to SmartThings development, since you can start from an existing SmartApp.
Creating a new Device Type Handler
To create a new Device Type, click the New SmartDevice button from the My Device Types page.
There are three different tabs on the New SmartDevice page that allow you to create a new Device Type Handler in different ways:
- From Form allows you to create a new Device Type Handler based on the some metadata you can enter into the form.
- From Code allows you to create a new Device Type Handler directly from existing code. This is useful if you receive the code for a Device Type Handler - just paste it in to the page and a new Device Type Handler will be created from it.
- From Template allows you to create a new Device Type Handler based upon existing Device Type Handlers. This is especially useful if you are new to SmartThings development, since you can start from an existing Device Type Handlers.
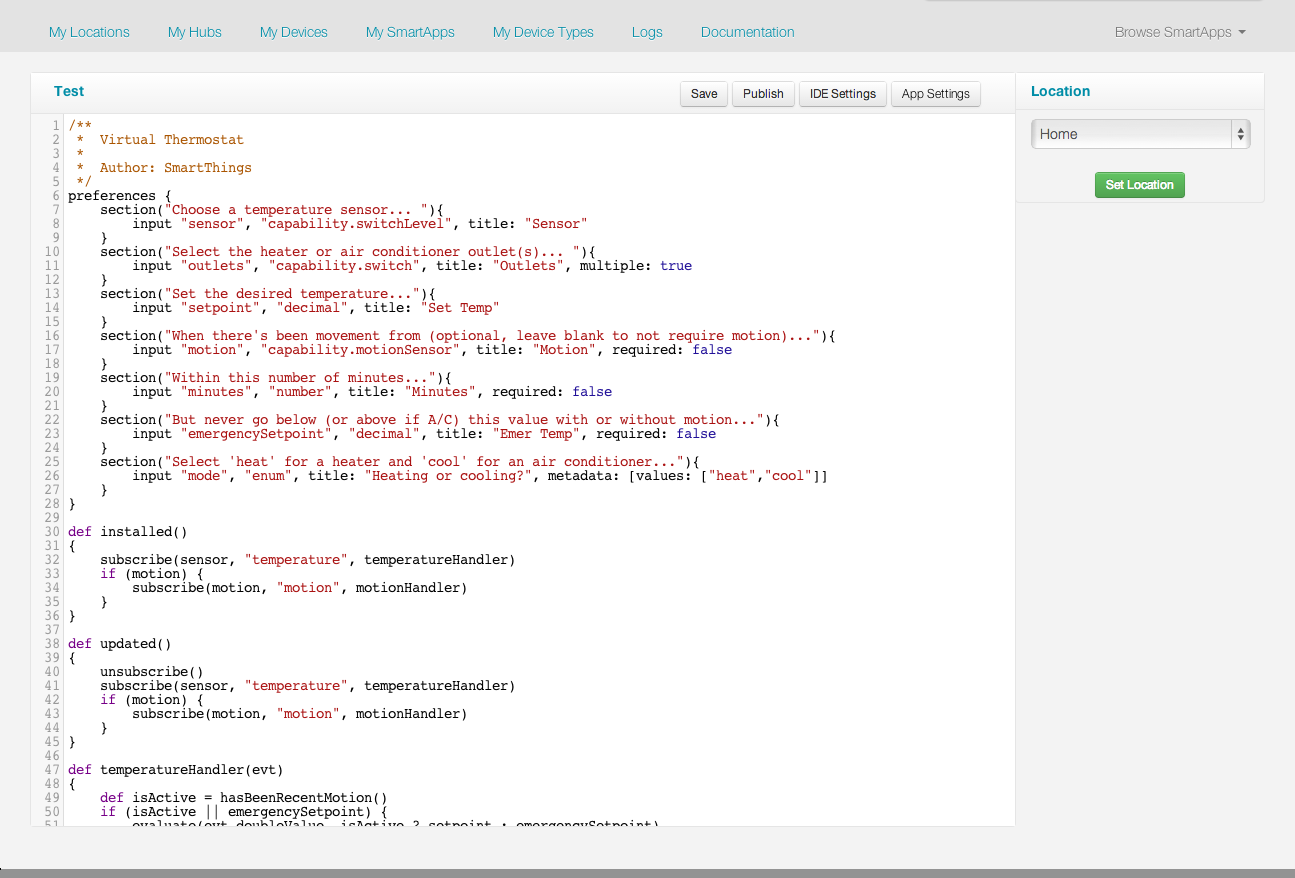
Using the Editor
The SmartThings web editor allows you to edit code, and provides syntax highlighting for easy code readability.
You can choose from a variety of themes, key maps, and font sizes to suit your preferences by clicking on the IDE Settings button above the editor frame.
Tip
Save often! To avoid losing unsaved changes when your session login to the IDE expires, get in the habit of saving often using Save button.
Using the Simulator
The simulator allows you to test your SmartApps or Device Type Handlers within the IDE, and without requiring you to have the actual physical devices.
When you run your application in the IDE, it is always running in the simulation framework. The IDE simulator does two very important things to support simulation:
- It acts as a “Virtual Hub” that has virtual devices connected to it
- It acts as if it was the SmartThings Mobile application to receive and process status updates and support direct user actions on devices through a simulated mobile app control.
The IDE simulation environment also allows you to run the simulator attached to any of the “Locations” defined within your account.
When editing a SmartApp or Device Type Handler, you can see the simulator on the right of the page. You can choose a location and click the Set Location button, and then input any preferences required by the SmartApp or Device Type Handler. Click the Install button to run the simulator.
When simulating a SmartApp, any selected devices will appear in the IDE, along with controls to actuate the devices:
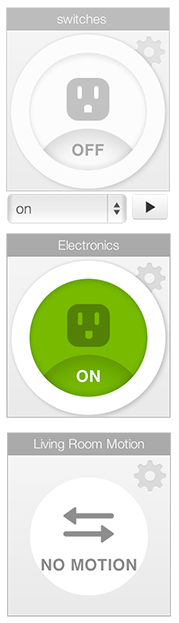
Note
Not all of the capabilities we support will work properly in the simulator. We are actively working to close those gaps.
Log Console
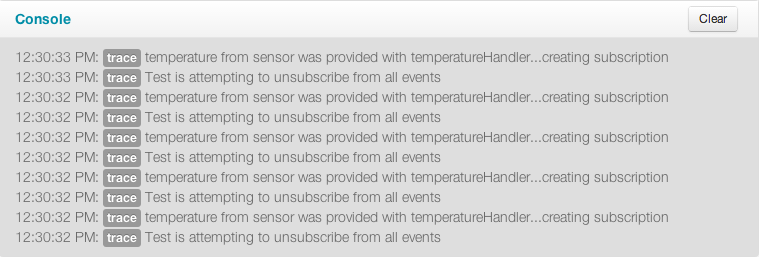
Once installed in the simulator, you will see a log console on the bottom of the page. This is where any logging statements in your code will appear.
The most recent logging statements will appear at the top of the logging console.
For more information about logging, refer to the Logging chapter of this guide.